Showing posts with label Blogger Design. Show all posts
Showing posts with label Blogger Design. Show all posts
Thursday, November 19, 2015
Popular Posts Widget With Hover Effect For Blogger
One of blogger tips and tricks you should try out. You'll love the result. This popular post widget shows the Thumbnail and Post Title when the page is fully loaded. When hovered over, a bouncing snippet effect takes place.
Also Read: Scrolling Popular Post Gadget For Blogger

1. To Add this popular post gadget to your blog, goto your blogger dashboard, click on 'Layout', 'Add A Gadget'.Select the Item Snippet and Image Thumbnail options before saving.
2. Goto your blogger template, click on 'edit html', using ctrl+f search for ]]></b:skin> copy and paste this code below just 'above' ]]></b:skin>
Also Read: Square Popular Posts Blogger Gadget with Rotating Effect
/* Popular Post Customization by informationtutorial158.blogspot.com */
.PopularPosts .widget-content ul li{padding:0;position:relative}
.item-snippet {font-size: 90%;line-height: 1.2em;position: absolute;width: 230px;background-color: whiteSmoke;padding: 7px;border-top: 2px solid #FF0202;z-index: 2;left: 300px;top: 60%;height: 4.5em!important;visibility: hidden;opacity: 0;transition: all 0.6s cubic-bezier(1,2,0,0) 0s;-moz-transition: all 0.6s cubic-bezier(1,2,0,0) 0s;-webkit-transition: all 0.6s cubic-bezier(1,2,0,0) 0s;-o-transition: all 0.6s cubic-bezier(1,2,0,0) 0s;}
.PopularPosts .widget-content ul li:hover .item-snippet{left:60px;opacity:1;visibility:visible}
.PopularPosts img{width:50px;height:50px}
.PopularPosts .item-title{font-family:'Open Sans Condensed',"Arial Narrow",Arial,sans-serif;font-size:125%}
/* Popular Post Customization by informationtutorial158.blogspot.com */
Read more »
Also Read: Scrolling Popular Post Gadget For Blogger

1. To Add this popular post gadget to your blog, goto your blogger dashboard, click on 'Layout', 'Add A Gadget'.Select the Item Snippet and Image Thumbnail options before saving.
2. Goto your blogger template, click on 'edit html', using ctrl+f search for ]]></b:skin> copy and paste this code below just 'above' ]]></b:skin>
Also Read: Square Popular Posts Blogger Gadget with Rotating Effect
/* Popular Post Customization by informationtutorial158.blogspot.com */
.PopularPosts .widget-content ul li{padding:0;position:relative}
.item-snippet {font-size: 90%;line-height: 1.2em;position: absolute;width: 230px;background-color: whiteSmoke;padding: 7px;border-top: 2px solid #FF0202;z-index: 2;left: 300px;top: 60%;height: 4.5em!important;visibility: hidden;opacity: 0;transition: all 0.6s cubic-bezier(1,2,0,0) 0s;-moz-transition: all 0.6s cubic-bezier(1,2,0,0) 0s;-webkit-transition: all 0.6s cubic-bezier(1,2,0,0) 0s;-o-transition: all 0.6s cubic-bezier(1,2,0,0) 0s;}
.PopularPosts .widget-content ul li:hover .item-snippet{left:60px;opacity:1;visibility:visible}
.PopularPosts img{width:50px;height:50px}
.PopularPosts .item-title{font-family:'Open Sans Condensed',"Arial Narrow",Arial,sans-serif;font-size:125%}
/* Popular Post Customization by informationtutorial158.blogspot.com */

Thursday, November 12, 2015
How to Show Ads and Gadgets In Blogger Mobile Version
Still wondering how you can make Ads and blogger gadgets appear on mobile version of blogger blogs? Waste no more time. The guidelines are given below. Most of the traffic we get are from mobile users who atimes don't view the web version of our blogs. This reduces the chances of getting clicks on ads, readers subscribing for post on the blog with the email gadget or viewing other related post which in turn increases your blog's bounce rate. For adverts, blogger gadgets like popular post gadget, labels, social media follow and subscription widget and the likes, these guidelines will show you how to display them on the mobile version of your blog, making your blogspot blog compatible with mobile phones . Also showing ads on mobile version of blogger will be another opportunity to make money.
- First, Goto your template
- Click on the gear icon for mobile settings.

- Select 'Yes. Show mobile template on mobile devices'.
- From the drop down menu, select 'custom'.
- Save your template.

Also Read: How to upload blogger template
How to Add HTML Parse Tool To Blogger
How to Make Ads and Gadgets Appear on Mobile Version of Blogger
- Next, goto 'layout'.
For New Gadgets
- Click on 'add gadget'.
- Select 'html/javascript', paste your code, either the ad code you generated or a blogger widget/gadget code.
- Save the gadget.
- Still in the layout section of your blog, edit the gadget you just created.
- View the address bar and note the 'html number', which is the widget ID of your new gadget/widget.

- Next, goto your blogger 'Template', click on 'Edit html'.
- Select 'Jump to widget' and click on the html number you noted previously (that is, if it was html12 or html8).

- Add this line of code when the widget/gadget opens in your template mobile='yes', just after where "locked false" appears.
 Or, If you want the widget/gadget to appear only on the mobile version of your blog and not on the web version, then add this instead mobile='only'.
- Save your template.
For Existing Gadgets
- Click on 'Edit' option for the gadget you want display on the mobile version of your blog.
- View the address bar and note the 'html number', which is the widget ID of your new gadget/widget.
- Next, goto your blogger 'Template', click on 'Edit html'.
- Select 'Jump to widget' and click on the html number you noted previously (that is, if it was html5 or html8).
- Add this line of code when the widget/gadget opens in your template mobile='yes', just after where "locked false" appears. Or, If you want the widget/gadget to appear only on the mobile version of your blog and not on the web version, then add this instead mobile='only'.
- Save your template.
How To Centralize Blogger Title And Description
NOTE: Using mobile='only' might bring error messages each time you try to rearrange the gadgets in layout. It'll be advisable for you to include mobile='yes' instead. With this your ads and gadgets will now be displayed on the mobile version of your blog.
Wednesday, November 11, 2015
Free Blog Backgrounds
Free Blog Backgrounds
Looking for Free blog backgrounds to improve your blogger or WordPress blog's design? Then, in this post, you'll find a list of places where you can find and download free blog backgrounds with unique texture and graphics which you can use in giving your blog a new look. With the options provided for customizing the background colour, images, and sizes, you can edit the background as it best suits you. Below are a list of sites where you can find free backgrounds for WordPress, Blogger Twitter, Facebook timeline covers etc.
The Cutest Blog On The Block

Cg Textures
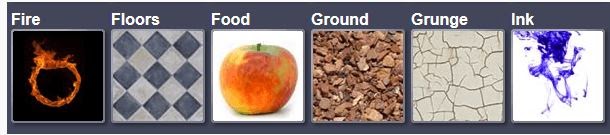
Hot Bliggity Blog

You can also try out the following sites:
How To Show Adsense Ads Below Blogger Post Title
Another blogger trick on how to display adsense ads below blogger post title to help you earn from your blog. How much you'll make from adsense depends on your traffic and where you place the ads to increase your CPC. Best places to show adsense ads are usually below the post title, in the middle or within the post body. This doesn't go against adsense policies. The adsense ads can be centalized, wrapped around text or aligned to the left within post. To do this, follow the steps below on how to show Adsense Ads below blogger post title.
Also Read: How to Add HTML Parse Tool To Blogger
How to Add Read More Attribution Links to Copied Text in Blogger
5. Replace 'PLACE YOUR AD CODE HERE' in the code above with your parsed adsense code. Save your blogger template. Goto your blog, you should see the new changes, if not paste the parsed ad code above the next <data:post.body/> you see.

Also Read: How To Centralise Blogger Title And Description
How To Add Customs Header Tags In Blogger

Also Read: Google Adsense Ads Now Showing In Opera Mini
Automatically Open all External Links in a New Window On Blogger
NOTE: In each of the codes above, ensure you replace 'PLACE YOUR AD HERE' with your parsed adsense code and you'll have adsense ads displaying within your blogger post title in no time.
Also Read: How to Add HTML Parse Tool To Blogger
How to Add Read More Attribution Links to Copied Text in Blogger
How To Place Adsense Ads In The Middle Of Blogger Post
- Next is to parse the code you generated from your adsense account. Visit this link to parse the adsense code . On the html parse site, paste your code and click on 'convert' . Your parsed code will be generated. Copy this into a notepad or any text editor. The parse code you generated is what we"ll be using.
- From your adsense account, create a new ad unit or get the code to any previous ad unit you have. Most preferred ones are usually 300*250 Medium Rectangle or 336*280 Large Rectangle ad sizes.
- Goto your blogger dashboard, click on 'template'. It will be advisable for you to backup your template first.
- Click on "edit html" in your template, Use Ctrl+F and search for this tag <data:post.body/> copy the code below and paste 'above' <data:post.body/>. This tag ( <data:post.body/>) will appear more than once in your template, paste the code either on the second or third tag, depending on which will work in displaying the adsense ad.
<b:if cond='data:blog.pageType == "item"'>
PLACE YOUR AD CODE HERE
</b:if>
5. Replace 'PLACE YOUR AD CODE HERE' in the code above with your parsed adsense code. Save your blogger template. Goto your blog, you should see the new changes, if not paste the parsed ad code above the next <data:post.body/> you see.

Also Read: How To Centralise Blogger Title And Description
How To Add Customs Header Tags In Blogger
How To Align Adsense Ad Within Blogger Post
- By default, the ad will be aligned to the left as shown in the image above. If you'll like your post to wrap around the adsense ad, then copy this code below and paste 'above' <data:post.body/>

<b:if cond='data:blog.pageType == "item"'>
<div style='float:left; margin:10px;'> // type this line manually, dont copy and paste
PLACE YOUR AD CODE HERE
</div>
</b:if>
Also Read: Google Adsense Ads Now Showing In Opera Mini
Automatically Open all External Links in a New Window On Blogger
How To Centralize Adsense Ad Within Blogger Post
- If you'll the ad to be centralized in your post, and the post below the Ad, copy this code instead..
<b:if cond='data:blog.pageType == "item"'>
<div align='center'>
PLACE YOUR AD CODE HERE
</div>
</b:if>
NOTE: In each of the codes above, ensure you replace 'PLACE YOUR AD HERE' with your parsed adsense code and you'll have adsense ads displaying within your blogger post title in no time.
Tuesday, November 10, 2015
How to Centralise Blogger Title and Description
Here's how you can centralize your blogger title and the description. By default, blogger title and description are aligned to the left. To make your blog's title and the description appear at the center of your blog, follow the steps below.


- From your Blogger Dashboard.
- Goto 'Template'
- Select 'Customise'.
- Click on 'Advanced'
- Scroll down and select 'Add CSS'
- Copy the code below and paste in the text field.
#header-inner img {margin: 0 auto !important;} #header-inner {text-align: Center ;}
- Click on 'Apply to blog' to save your changes.
Wednesday, November 4, 2015
How to Upload Blogger Template
So you've downloaded a blogger template and want to know how to upload it on your blog. Below are the guidelines on how to upload blogger templates, whether you're a newbie or a pro. Improving your blog's design will need a new good and responsive template other than the default blogger templates that have limited widgets/gadgets. Even though the default templates are good to use, they don't give your blog a professional look.
1. Blogger supports XML web template. If your template is in zip format, then extract it using winrar.
2. Goto your blogger dashboard, click on 'template'. On the top right corner you should see 'backup/restore', click on it. Backup your template by clicking on 'download full template'.

3. After backing up your template, click on 'choose file' which directs you to your computer's folders. Locate where you saved the extracted XML file.

4. Select the XML template from your PC then click on 'open'. This will redirect you back to blogger.
5. Click on 'upload' and the process ic completed. You can choose to customize the blogger template on how it should appear on mobile and desktop versions of your blog.
Read more »
How to upload or Install Template in Blogger
1. Blogger supports XML web template. If your template is in zip format, then extract it using winrar.
2. Goto your blogger dashboard, click on 'template'. On the top right corner you should see 'backup/restore', click on it. Backup your template by clicking on 'download full template'.
3. After backing up your template, click on 'choose file' which directs you to your computer's folders. Locate where you saved the extracted XML file.
4. Select the XML template from your PC then click on 'open'. This will redirect you back to blogger.
5. Click on 'upload' and the process ic completed. You can choose to customize the blogger template on how it should appear on mobile and desktop versions of your blog.
Monday, November 2, 2015
How to Add Numbered Page Navigation Widget In Blogger
Guidelines on how to add numbered page navigation widget in blogger blogs are given in this post. With the default page navigation in blogger, one cannot jump to a specific page without going through tags like 'newer post', 'older post' etc. Since there is no numbering of pages, it makes it hard to know the exact number of pages on the blog. I'll say it's one of the best blogger widgets because including it in your blog will provide a better navigation for your readers, where they can skip multiple pages and return to them. Also, you can use it to add an extra design to your blog. Follow the steps below to add the numbered page navigation widget in your blog.
Square Popular Posts Blogger Widget with Rotating Effect
Sliding Recent Post Widget For Blogger
How to Add Numbered Page Navigation In Blogger
There are two methods listed in this post on how to add the widget in your blogger blog. You can use any of the methods.
Method 1
Method 1
- From your blogger dashboard,
- Goto 'Layout'.
- Click on 'Add a gadget'.
- Select 'Html/Javascript'.
- Copy the code below and paste inside the text field. (Don't name the gadget)

<style type='text/css'>
#blog-pager{height: 28px;
    padding: 10px 0 0;
overflow:hidden;
text-align:center;
}
.showpageArea a {text-decoration:underline;
font-size: 16px;
       text-align: center;}
.showpageNum a {font-size:16px;text-decoration:none;border: 1px solid #cccccc;margin:0 5px;padding:5px;}
.showpageNum a:hover {border: 1px solid #cccccc;background-color:#cccccc;}

.showpagePoint {font-size:16px;text-decoration:none;border: 1px solid #cccccc;background: #216FD9;margin:0 5px;padding:5px;color:#ffffff;}

.showpageOf {text-decoration:none;padding:5px;margin: 0 5px;}
.showpage a {text-decoration:none;border: 1px solid #cccccc;padding:5px;}
.showpage a:hover {text-decoration:none;background: #cccccc;}
.showpageNum a:link,.showpage a:link {text-decoration:none;color:#333333;}</style>
<script style='text/javascript'>var pageCount=6;
var displayPageNum=5;var upPageWord="Previous";var downPageWord="Next";</script><a href="http://informationtutorial15.blogspot.com" style="font-size:0pt">Blogger Widgets</a>
<script style='text/javascript' src='http://netoopscodes.googlecode.com/svn/netoops-page-nav-v2.js'></script>
Style 2

<style type="text/css">#blog-pager{font-size:normal}.showpageArea{font-family:verdana,arial,helvetica;color:#000;font-size:11px;margin:10px}.showpageArea a{color:#000;text-shadow:0 1px 2px #fff;font-weight:normal}.showpageNum a{padding:3px 8px;margin:0 4px;text-decoration:none;border:1px solid #999;-webkit-border-radius:3px;-moz-border-radius:3px;background:#b1a7c3 url(https://blogger.googleusercontent.com/img/b/R29vZ2xl/AVvXsEjePefNyWUFsyX-PRDPcvlytf1chfzxdu3-Omm9bEu2E9iE5cuTZ6kuRWsVxkpz0mI0VE2pu891rsSkgkKXMWlo3QdO5EhAAIqhcvWgCeTG6zXAwW4D5VVDRZW36USZDwYRmfZp3k_ngYDr/s1600/w2b_pagenav2.png) 0 -60px repeat-x}.showpageNum a:hover{border:1px solid #888;background:#f7b36a url(https://blogger.googleusercontent.com/img/b/R29vZ2xl/AVvXsEjePefNyWUFsyX-PRDPcvlytf1chfzxdu3-Omm9bEu2E9iE5cuTZ6kuRWsVxkpz0mI0VE2pu891rsSkgkKXMWlo3QdO5EhAAIqhcvWgCeTG6zXAwW4D5VVDRZW36USZDwYRmfZp3k_ngYDr/s1600/w2b_pagenav2.png) 0 -30px repeat-x}.showpageOf{margin:0 4px 0 0}.showpagePoint{color:#444;text-shadow:0 1px 2px #333;padding:3px 8px;margin:2px;font-weight:700;-webkit-border-radius:3px;-moz-border-radius:3px;border:1px solid #999;background:#f7d5b0 url(https://blogger.googleusercontent.com/img/b/R29vZ2xl/AVvXsEjePefNyWUFsyX-PRDPcvlytf1chfzxdu3-Omm9bEu2E9iE5cuTZ6kuRWsVxkpz0mI0VE2pu891rsSkgkKXMWlo3QdO5EhAAIqhcvWgCeTG6zXAwW4D5VVDRZW36USZDwYRmfZp3k_ngYDr/s1600/w2b_pagenav2.png) 0 0 repeat-x;text-decoration:none} </style> <a href="http://informationtutorial15.blogspot.com/" target="_blank" title="Blogger Tips and Tricks"><img src="https://bitly.com/24workpng1" alt="Blogger Tips and Tricks" border="0" style="position: fixed; bottom: 10%; right: 0%; top: 0px;" /></a><a href="http://informationtutorial15.blogspot.com/" target="_blank" title="Latest Tips And Tricks"><img src="https://bitly.com/24workpng1" alt="Latest Tips And Tricks" border="0" style="position: fixed; bottom: 10%; right: 0%;" /></a><a href="http://informationtutorial15.blogspot.com/" target="_blank" title="Blogger Tricks"><img src="https://bitly.com/24workpng1" alt="Blogger Tricks" border="0" style="position: fixed; bottom: 10%; left: 0%;" /></a><script style='text/javascript'>
var postperpage=5;
var numshowpage=6;
var upPageWord="Prev";
var downPageWord="Next";
var home_page="/";
var urlactivepage=location.href;
</script>
<script style='text/javascript' src='http://24work-new.googlecode.com/svn/trunk/24work-blogspot/page-navigation/new-code/0-test-p-n-01_00-ycode.js'></script>
- Save the gadget.
- Move the gadget you just created below 'Blog posts'. (Refer to image below)
- Click on 'save arrangement'.

Also Read: jQuery Background Slideshow Plugin For Blogger
Recommended Post Slide Out Widget For Blogger
Add Different Background Image In Specific Blogger Page
Method 2
Recommended Post Slide Out Widget For Blogger
Add Different Background Image In Specific Blogger Page
Method 2
- Goto your blogger template
- Click on 'Edit Html'.
- Use Ctrl+F keys,Search for this tag ]]></b:skin>
- Copy the codes for any of your preferred styles below.
- Paste it 'above' ]]></b:skin>
Style 1

#blog-pager{clear:both;margin:30px auto; padding: 7px; text-align:center;font-size: 11px;background-image: -webkit-gradient(linear,left bottom,left top,color-stop(0, #000000),color-stop(1, #292929));background-image: -o-linear-gradient(top, #000000 0%, #292929 100%);background-image: -moz-linear-gradient(top, #000000 0%, #292929 100%);background-image: -webkit-linear-gradient(top, #000000 0%, #292929 100%);background-image: -ms-linear-gradient(top, #000000 0%, #292929 100%);background-image: linear-gradient(to top, #000000 0%, #292929 100%); padding: 6px;-webkit-border-radius: 3px;-moz-border-radius: 3px;border-radius: 3px;}
.blog-pager {background: none;}
.displaypageNum a,.showpage a,.pagecurrent{padding: 3px 10px;margin-right:5px; color: #fff;}
.displaypageNum a:hover,.showpage a:hover,.pagecurrent{background-image: -webkit-gradient(linear,left bottom,left top,color-stop(0, #59A2CF),color-stop(1, #D9EAFF));background-image: -o-linear-gradient(top, #59A2CF 0%, #D9EAFF 100%);background-image: -moz-linear-gradient(top, #59A2CF 0%, #D9EAFF 100%);background-image: -webkit-linear-gradient(top, #59A2CF 0%, #D9EAFF 100%);background-image: -ms-linear-gradient(top, #59A2CF 0%, #D9EAFF 100%);background-image: linear-gradient(to top, #59A2CF 0%, #D9EAFF 100%);text-decoration: none;color: #000;-webkit-border-radius: 3px;-moz-border-radius: 3px;border-radius: 3px;}
.showpageOf{display:none!important}.blog-pager-older-link, .home-link, .blog-pager-newer-link {background: transparent;}
a.blog-pager-older-link, a.home-link, a.blog-pager-newer-link {color: #fff;}
#blog-pager .pages{border:none;background: none;}
Style 2

#blog-pager{clear:both;margin:30px auto;text-align:center; padding: 7px; }
.blog-pager {background: none;}
.displaypageNum a,.showpage a,.pagecurrent{font-size: 13px;padding: 5px 12px;margin-right:5px; color: #3E5801; background-color:#E0EDC1;}
.displaypageNum a:hover,.showpage a:hover, .pagecurrent{background:#FEF6DF;text-decoration:none;color: #E16800;}
#blog-pager .pagecurrent{font-weight:bold;color: #D25E71;background:#FFDEDF;}
 .showpageOf{display:none!important}
#blog-pager .pages{border:none;}
Style 3

#blog-pager{clear:both;margin:30px auto;text-align:center; padding: 7px; }
.blog-pager {background: none;}
.displaypageNum a,.showpage a,.pagecurrent{font-size: 13px;padding: 5px 12px;margin-right:5px; color: #AD0B00; background-color:#FAB001;}
.displaypageNum a:hover,.showpage a:hover, .pagecurrent{background:#DB4920;text-decoration:none;color: #fff;}
#blog-pager .pagecurrent{font-weight:bold;color: #fff;background:#DB4920;}
 .showpageOf{display:none!important}
#blog-pager .pages{border:none;}
Style 4

#blog-pager{clear:both;margin:30px auto;text-align:center; padding: 7px;}
.blog-pager {background: none;}
.displaypageNum a,.showpage a,.pagecurrent{font-size: 14px;padding: 5px 12px;margin-right:5px; color: #666; background-color:#eee;}
.displaypageNum a:hover,.showpage a:hover, .pagecurrent{background:#359BED;text-decoration:none;color: #fff;}
#blog-pager .pagecurrent{font-weight:bold;color: #fff;background:#359BED;}
 .showpageOf{display:none!important}
#blog-pager .pages{border:none;}
- After adding the code for your preferred style, search for </body> inside your template.
- Copy the code below and paste 'above' </body>
<b:if cond='data:blog.pageType != "item"'>
<b:if cond='data:blog.pageType != "static_page"'>
<script type='text/javascript'>
/*<![CDATA[*/
var perPage=7;
var numPages=6;
var firstText ='First';
var lastText ='Last';
var prevText ='« Previous';
var nextText ='Next »';
var urlactivepage=location.href;
var home_page="/";
/*]]>*/
</script>
<script src="http://helplogger.googlecode.com/svn/trunk/page-navigation2.js"/>
</b:if>
</b:if>
Next, we'll enable the page navigation widget in Label pages. To do this,
- Search for expr:href='data:label.url' in your template.

- Replace it with expr:href='data:label.url + "?&max-results=7"'
- Save your template.
How to Customize Page Navigation Widget In Blogger
You can customise the following fields in this widget:
perPage: 7, (change this to the number of post you want to display per page).
numPages: 6, (change this to the number of pages to be displayed at once on the widget)
var firstText ='First'; (change this to your own text for the first post on the blog)
var lastText ='Last'; (change this to your owntext for the last post on the blog)
var prevText ='« Previous'; (change the text to be displayed to go backwards)
var nextText ='Next »';
Sunday, November 1, 2015
Auto Scrolling Popular Post Blogger Widget
Scrolling Popular Post Gadget/Widget For Blogger
Popular post widget as one of the best blogger gadget can be changed from its default design to a customized one like the auto scrolling popular post blogger widget which slides your most read post up and down. A basic widget which you'll see on most sites you visit is the popular post blogger widget, mainly because attracts readers who are inquisitive in knowing why that particular post is popular or that it might be really relevant to have such high page views. This blogger widget can reduce the bounce rate of your blog and increase your blog's pageviews.Also Read: Popular Post Blogger Widget With Hover Effect
Link to This Post Widget' to Blogger
IP Widget For Blogger
One major problem with blogger gadgets/widgets is finding the right location on the blog to place them which will get the attention of as many readers as possible that visit the blog. With this auto Scrolling Popular Post widget, you'll be sure that your blog readers will be easily attracted because of the scrolling effect.
Also Read: Related Posts Widget For Blogger / Blogspot with jQuery
Square Popular Posts Blogger Widget with Rotating Effect
Sliding Recent Posts Widget For Blogger
How to Add Scrolling Popular Post Gadget For Blogger
- From your blogger dashboard, goto 'layout'
- Select 'add a gadget' depending on where you want to place it on your blog
- Select on 'html/javascript'
- Copy the code below and paste in the text field.
<!----Start copy here---->
<style type="text/css" media="screen">
#PopularPosts1 {
overflow:hidden;
margin-top:5px;
width:100%;
padding:0px 0px;
height:310px;
}
#PopularPosts1 ul {
width:310px;
overflow:hidden;
list-style-type: none;
padding: 0px 0px;
margin:10px 0px 0px 10px;
}
#PopularPosts1 li {
 width:290px;
padding: 5px 5px;
margin:0px 0px 5px 0px;
list-style-type:none;
float:none;
height:80px;
overflow: hidden;
background:#fff url(https://blogger.googleusercontent.com/img/b/R29vZ2xl/AVvXsEhXU2nO9Nw7A_q_D73z7ijQtcOPzrY-t2qV1MpFBLqhlzsdhycQCgVPiN8Qlr78YDEJyejiJ6UBVZGyHvtE4Q0EBXxmutttYtmR_26JQs73ItxV4PCIH-kCzaX812qLLHCjzhgjL_k7BnE/s400/popular+posts.jpg) repeat-x;
border:1px solid #ddd;
}
#PopularPosts1 li .item-title {

    font-size:1em;
    margin-bottom:0.5em;
}
#PopularPosts1 li .item-title a {
text-decoration:none;
color:#7CA2C4;
font:bold 12px verdana;
height:18px;
overflow:hidden;
margin:0px 0px;
padding:0px 0px 2px 0px;
}
#PopularPosts1 li img {
float:left;
margin-right:5px;
background:#EFEFEF;
border:2px solid #7CA2C4;
}
#PopularPosts1 li .item-snippet {
  overflow:hidden;
font-family:Tahoma,Arial,verdana, sans-serif;
font-size:10px;
color:#289728;
padding:0px 0px;
margin:0px 0px;
}
#PopularPosts1 .item-snippet a,
#PopularPosts1 .item-snippet a:visited {
    color:#3E4548;
    text-decoration: none;
}
#PopularPosts1 .spyWrapper {
    height: 100%;
    overflow: hidden;
    position: relative;
}
#PopularPosts1 {
    -webkit-border-radius: 5px;
    -moz-border-radius: 5px;
}
.tags span,
.tags a {
    -webkit-border-radius: 8px;
    -moz-border-radius: 8px;
}
a img {
    border: 0;
}
-->
</style>
<script src="http://ajax.googleapis.com/ajax/libs/jquery/1.6.2/jquery.min.js" type="text/javascript"></script>
<script type="text/javascript" charset="utf-8">
$(function () {
    $('.popular-posts ul').simpleSpy();
});
</script>
<script src="http://accordion-for-blogger.googlecode.com/svn/trunk/simplespy.js" type="text/javascript"></script><div style="float:   left;">
<a href="http://informationtutorial15.blogspot.com/2015/11/scrolling-popular-post-gadget-for.html" target="_blank"><sup> GrabThis!! </sup></a></div>
<!----Stop copy here---->
- Save the gadget.
Subscribe to:
Posts (Atom)